
Looking to make a restaurant-style beef chimichanga recipe at home? You’re in for a treat! Chimichangas are deep-fried or baked burrito-style wraps filled with flavorful beef, cheese, and a mix of spices that give them a crispy exterior and savory, juicy inside. Popular in Mexican-American cuisine, they’re perfect for family dinners, parties, or even just a cozy night in.
In this guide, we’ll cover everything from the history of chimichangas to step-by-step instructions for preparing the perfect beef filling, folding the tortillas, and cooking them to perfection. Plus, we’ll throw in some tips for side dishes and toppings to elevate your meal. Ready to make magic in the kitchen? Let’s dive in!
Table of Contents
What Is a Chimichanga and Its Origins?
Chimichangas may seem like a simple fried burrito, but they have a fascinating history and a flavor profile that’s anything but ordinary.
The Origins of Chimichangas
The story of the chimichanga begins in the southwestern United States, particularly in Arizona. There’s some debate over its origin, but one popular tale credits Monica Flin, founder of the famous El Charro Café in Tucson, with accidentally dropping a burrito into a frying pan. Flustered, she exclaimed, “Chimichanga!”—a playful word that’s similar to a Spanish expletive. The happy accident turned into a culinary sensation.
Over the years, the chimichanga has become a staple of Mexican-American cuisine, often featured in restaurants across the U.S. It retains its Mexican heritage while offering a crispy, indulgent twist that appeals to a wide audience.
Why Chimichangas Are a Mexican-American Favorite
One bite of a perfectly cooked chimichanga, and it’s easy to see why this dish has such a devoted following. The crispy outer shell gives way to tender beef seasoned with cumin, garlic, chili powder, and onion. Add a gooey layer of melted cheese, and you’ve got a comfort food masterpiece.
Chimichangas are also incredibly versatile. While the classic beef chimichanga recipe is a fan favorite, you can customize it with different proteins like chicken, pork, or even a vegetarian filling. No matter how you stuff it, the combination of textures and flavors makes it hard to resist.
In the next section, we’ll break down the essential ingredients you’ll need to make this dish a success. 🌮
Ingredients Needed for a Classic Beef Chimichanga Recipe
To make a mouthwatering beef chimichanga recipe, you’ll need the perfect combination of flavors, from savory seasoned beef to crispy golden tortillas. Here’s what you’ll need to get started.
Essential Ingredients for the Beef Filling
- Ground Beef or Shredded Beef:
Ground beef is often the go-to for a quick and easy option, but shredded beef made from slow-cooked brisket or chuck roast can elevate the flavor and texture. - Seasonings and Spices:
A blend of chili powder, cumin, garlic powder, and onion powder will create that bold, Mexican-inspired flavor. Feel free to add a pinch of cayenne pepper if you like a bit of heat. - Vegetables:
Diced onions, bell peppers, and minced garlic add depth to the filling. Sauté them with the beef to enhance the overall taste. - Cheese:
Cheddar, Monterey Jack, or a Mexican cheese blend works perfectly for a gooey interior. The cheese also helps bind the filling, preventing it from spilling out.
Tortilla and Frying Components
- Large Flour Tortillas:
Use large, pliable flour tortillas to hold the filling securely without tearing. Corn tortillas aren’t typically used for chimichangas because they lack flexibility. - Oil for Frying:
Vegetable oil or canola oil is ideal for deep-frying because they have high smoke points, ensuring that the tortillas turn golden and crispy without burning. - Optional Toppings:
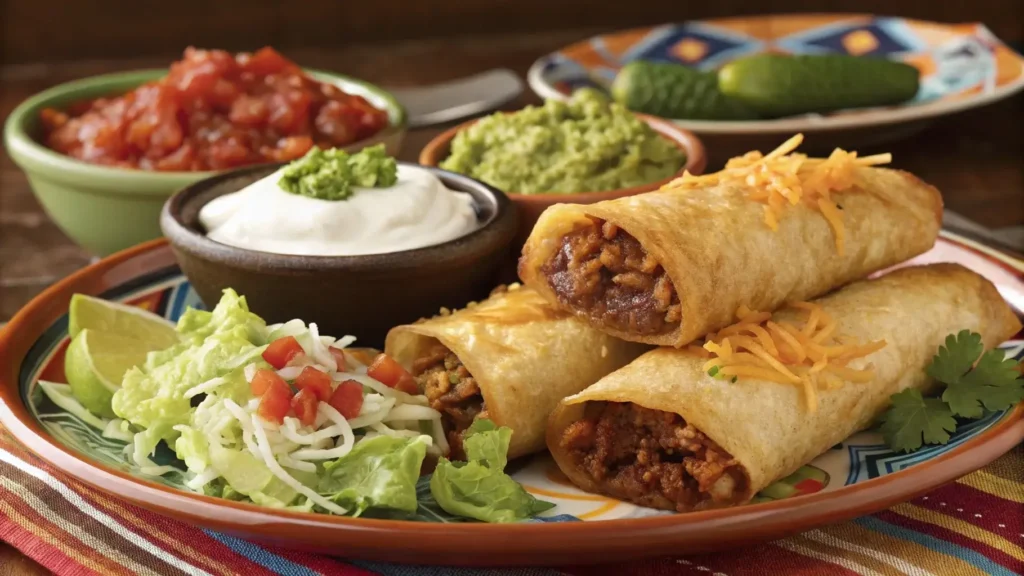
Don’t forget the sour cream, guacamole, salsa, and shredded lettuce for that final burst of flavor and texture.
Now that you’ve gathered your ingredients, it’s time to cook the beef filling to perfection. For more tips on cooking flavorful beef, you might enjoy this guide to beef sausage preparation, which shares expert tips on balancing spices and moisture.
Preparing the Beef Filling Step-by-Step
The secret to a delicious beef chimichanga recipe is a perfectly seasoned filling. Follow these simple steps to create a savory, juicy beef mixture that’ll have everyone coming back for seconds.
Cooking the Beef
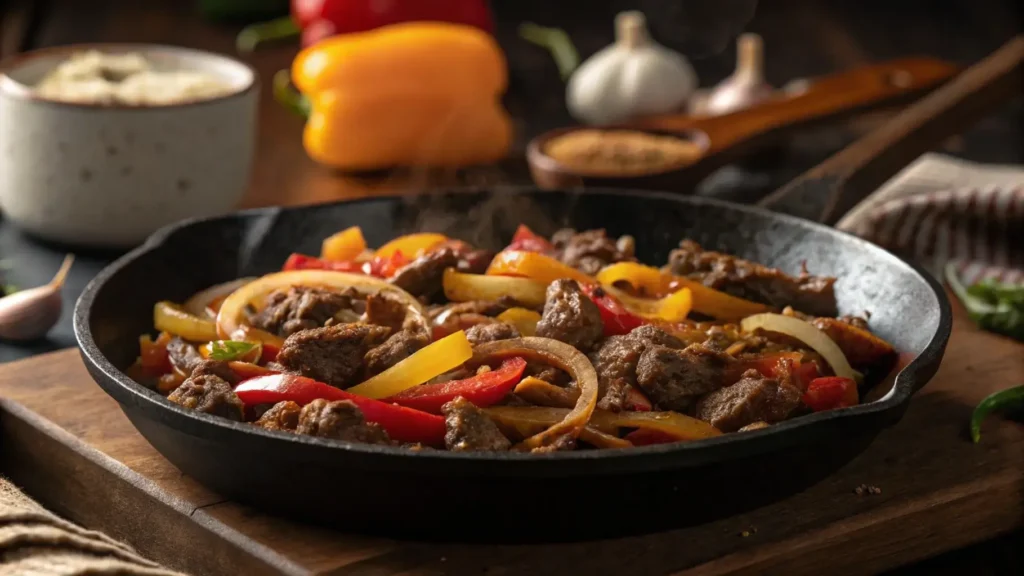
- Brown the Ground Beef or Sear the Shredded Beef:
If using ground beef, heat a skillet over medium heat, add a splash of oil, and cook the beef until browned and no longer pink (about 6-8 minutes). For shredded beef, sear it briefly in oil until golden brown on the outside. - Drain Excess Fat:
Once cooked, drain any excess fat to prevent a greasy filling. This step is essential to maintaining a balanced texture without sogginess.
Adding Seasonings and Vegetables
- Sauté Onions, Garlic, and Bell Peppers:
In the same skillet, add diced onions, garlic, and bell peppers. Sauté them for 3-5 minutes or until soft and fragrant. - Incorporate the Spices:
Stir in chili powder, cumin, garlic powder, onion powder, salt, and pepper. Toast the spices for about a minute to release their flavors and coat the vegetables evenly. - Combine the Ingredients:
Add the cooked beef back into the skillet and mix well with the vegetables and spices. If the mixture seems too dry, add a splash of beef broth for moisture.
Simmering for Flavor Development
- Simmer for 5-10 Minutes:
Lower the heat and let the beef mixture simmer gently for a few minutes. This allows the flavors to meld and the meat to absorb the spices. - Add Cheese:
Stir in shredded cheese, allowing it to melt into the beef mixture. This step helps bind the filling and creates that rich, gooey texture you’ll love when you bite into the chimichanga.
With your filling ready, you’re just a few steps away from assembling the chimichangas. In the next section, we’ll show you how to fold them properly and prevent any filling from leaking out. 🌟
Assembling and Folding the Chimichangas
Now that you’ve prepared the savory filling, it’s time to assemble your chimichangas. A properly folded tortilla is key to keeping the filling intact while frying or baking. Follow these steps to prevent leaks and ensure a perfect crisp exterior.
How to Properly Fold and Secure the Chimichanga
- Warm the Tortillas:
To avoid tearing, warm the flour tortillas in a dry skillet for 10-15 seconds on each side or wrap them in a damp paper towel and microwave for 20-30 seconds. Warm tortillas are more pliable and easier to fold. - Fill the Tortilla:
Lay the tortilla flat on a clean surface. Spoon ½ to ¾ cup of the beef filling into the center. Avoid overstuffing to prevent difficulty when folding. - Add Cheese (Optional):
Sprinkle a bit of shredded cheese on top of the filling for extra flavor and binding. - Fold the Tortilla:
Fold in the sides to enclose the filling, then fold the bottom up and tightly roll it toward the top. Ensure the seam side faces down when frying or baking. - Secure with Toothpicks:
If necessary, use toothpicks to hold the folds in place while cooking. Just remember to remove them before serving!
Tips to Prevent the Filling from Leaking
- Don’t overfill the tortilla, as this can cause it to burst open during cooking.
- Make sure the tortilla is completely sealed, with no gaps for the filling to escape.
- Use thick, high-quality flour tortillas, as thin ones are more prone to tearing.
With the chimichangas assembled, you’re ready to cook them to golden perfection. In the next section, we’ll explore different cooking methods, including deep frying, baking, and air frying. For more tips on achieving the perfect texture in fried dishes, check out this crispy chicken recipe.
Cooking Methods: Frying vs. Baking
Choosing the right cooking method for your beef chimichanga recipe depends on your preference for texture and health considerations. Whether you like it deep-fried and crispy or baked with less oil, these methods will help you achieve delicious results.
Deep-Frying for a Crisp Texture
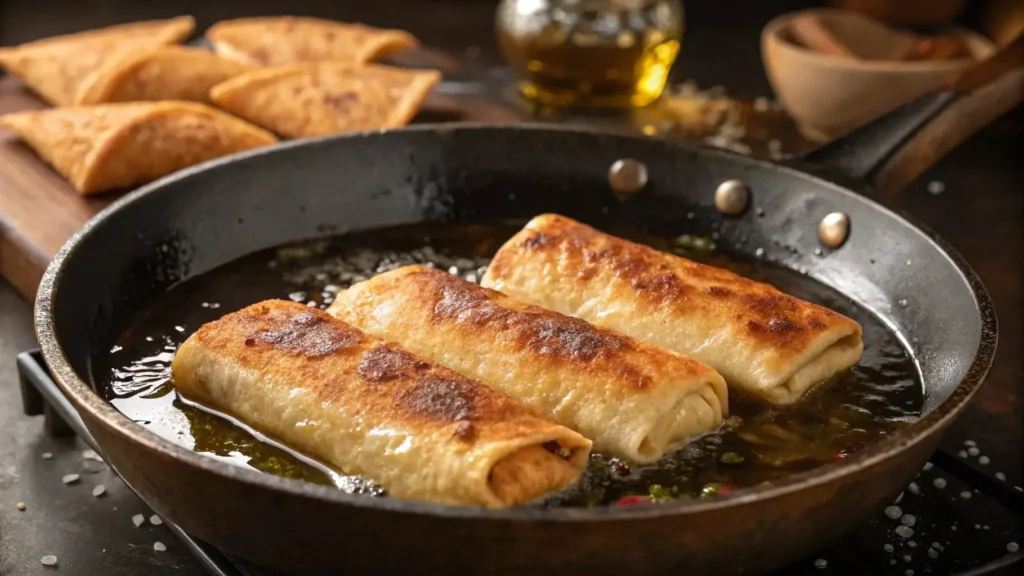
- Heat the Oil:
In a deep fryer or large pot, heat vegetable or canola oil to 350°F (175°C). Use enough oil to fully submerge the chimichangas. - Fry Until Golden Brown:
Carefully place the chimichangas seam-side down into the hot oil. Fry for 2-4 minutes on each side or until golden brown and crispy. Don’t overcrowd the pan to ensure even cooking. - Drain the Excess Oil:
Remove the chimichangas and place them on a paper towel-lined plate to drain excess oil.
Deep frying is the traditional method and creates that signature crunch, but it’s not the only way to enjoy this dish.
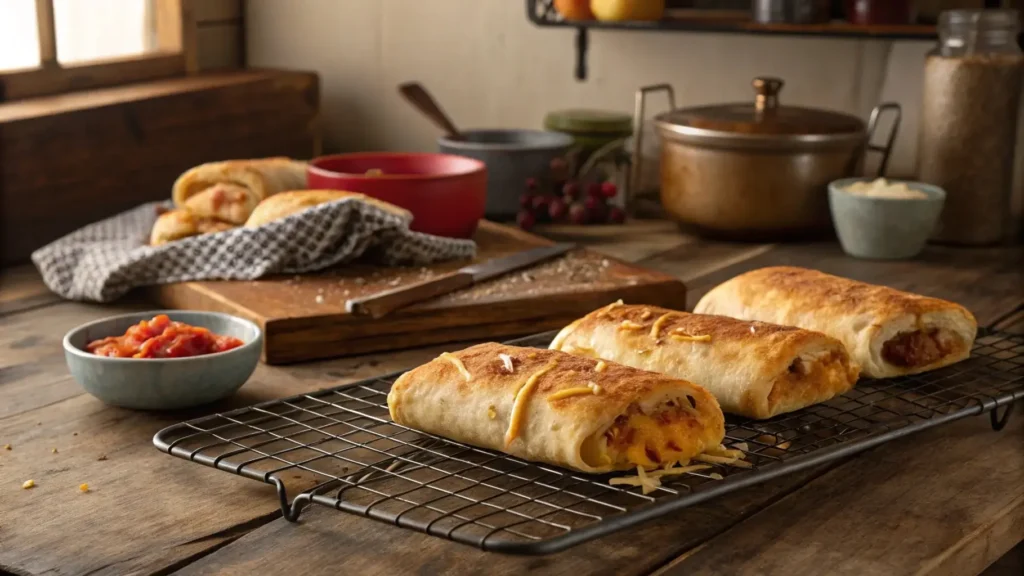
Baking Chimichangas for a Healthier Option
- Preheat the Oven:
Set your oven to 400°F (200°C). - Brush with Oil:
Lightly brush the chimichangas with vegetable oil or melted butter to help them crisp up in the oven. - Bake:
Place them on a baking sheet lined with parchment paper and bake for 20-25 minutes, flipping halfway through.
Baking reduces the amount of oil but still delivers a satisfying crunch. For an even crispier texture, finish with a quick broil for 2-3 minutes.
Air Fryer Chimichangas: The Best of Both Worlds
An air fryer combines the crispiness of frying with the health benefits of baking. Set the air fryer to 375°F (190°C) and cook for 10-12 minutes, flipping halfway. The result is golden, crispy chimichangas with minimal oil.
Whichever method you choose, you’re guaranteed a delicious beef chimichanga recipe that’s crispy on the outside and bursting with flavor on the inside. 🌟
Toppings and Side Dishes to Serve with Beef Chimichangas
No beef chimichanga recipe is complete without the right toppings and side dishes to complement its crispy texture and flavorful filling. Here’s how to take your chimichanga meal to the next level.
Classic Toppings: Sour Cream, Guacamole, and Salsa
- Sour Cream:
A cool, creamy topping that balances the spices in the beef filling. A dollop of sour cream on top of your chimichanga adds richness and helps cut through the crispiness. - Guacamole:
Guacamole brings a smooth texture and fresh flavor. The avocado’s creaminess pairs perfectly with the savory beef, while hints of lime and cilantro brighten the dish. - Salsa:
Whether you prefer a mild tomato salsa or a spicy pico de gallo, salsa adds acidity and a burst of freshness. You can also try salsa verde for a tangy kick.
Side Dishes: Mexican Rice, Refried Beans, or Corn Salad
- Mexican Rice:
Fluffy, seasoned rice cooked with tomatoes, onions, and garlic is a classic side dish for chimichangas. The subtle flavor complements the boldness of the beef filling. - Refried Beans:
Creamy refried beans add heartiness and depth to your meal. They’re perfect for scooping up bites of the chimichanga or as a filling on the side. - Corn Salad:
A refreshing corn salad with lime, cilantro, and chili powder can balance the fried richness of the chimichanga with sweet and tangy notes.
With the right toppings and sides, you’ll create a well-rounded and satisfying meal that captures the essence of Mexican-American cuisine. Ready to personalize your dish? Let’s explore some customization tips next!
Tips for Customizing Your Beef Chimichanga Recipe
One of the best things about a beef chimichanga recipe is how easy it is to customize. You can tweak the filling, add extra heat, or even experiment with different types of meat and toppings to create your perfect meal.
Adding Cheese and Different Meats
- Cheese Options:
If you’re a cheese lover, try mixing multiple types for a more complex flavor. Monterey Jack, cheddar, or a Mexican blend all work great. For a creamier texture, consider adding queso or cream cheese to the beef filling. - Different Proteins:
While beef is a classic, you can switch things up by using shredded chicken, pork carnitas, or even a plant-based meat alternative. Each protein brings its unique flavor while maintaining that signature crispy wrap.
Spicing It Up: Jalapeños or Hot Sauce
- Fresh Jalapeños:
Want to add heat directly to the filling? Dice fresh jalapeños and sauté them with the onions and peppers. For a more intense kick, leave the seeds in. - Hot Sauce or Salsa Roja:
Drizzle your favorite hot sauce or homemade salsa roja over the finished chimichanga for a fiery boost. If you’re feeling adventurous, try a smoky chipotle sauce.
By playing with the ingredients and heat levels, you can make your chimichangas as mild or as spicy as you like. Customize them to suit your mood or impress your guests at dinner! 🌟
Common Mistakes to Avoid
Even with the best ingredients, small mistakes can prevent your beef chimichanga recipe from turning out perfectly. Here are common pitfalls to avoid so you can enjoy a golden, crispy masterpiece every time.
Overstuffing the Tortilla
It’s tempting to load up the tortilla with as much filling as possible, but this can cause major issues during cooking. Overstuffed chimichangas are more likely to burst open, leak filling, and cook unevenly. To avoid this, stick to about ½ to ¾ cup of filling per tortilla and fold them tightly.
Pro tip: If you’re using shredded beef, ensure any excess liquid is drained before filling the tortillas to prevent sogginess.
Not Sealing the Chimichanga Properly
If the tortilla isn’t folded and secured correctly, the filling can escape during frying or baking. Be sure to fold the sides in tightly, roll the tortilla snugly, and place it seam-side down. You can use toothpicks for extra security if needed—just don’t forget to remove them before serving!
Another tip: Warming the tortillas before assembling makes them more flexible and easier to fold without tearing.
By avoiding these common mistakes, your chimichangas will stay intact, cook evenly, and be full of flavor from the first bite to the last.
FAQs About Beef Chimichangas
Got questions about perfecting your beef chimichanga recipe? Here are answers to some of the most common inquiries to help you make the best chimichangas every time.
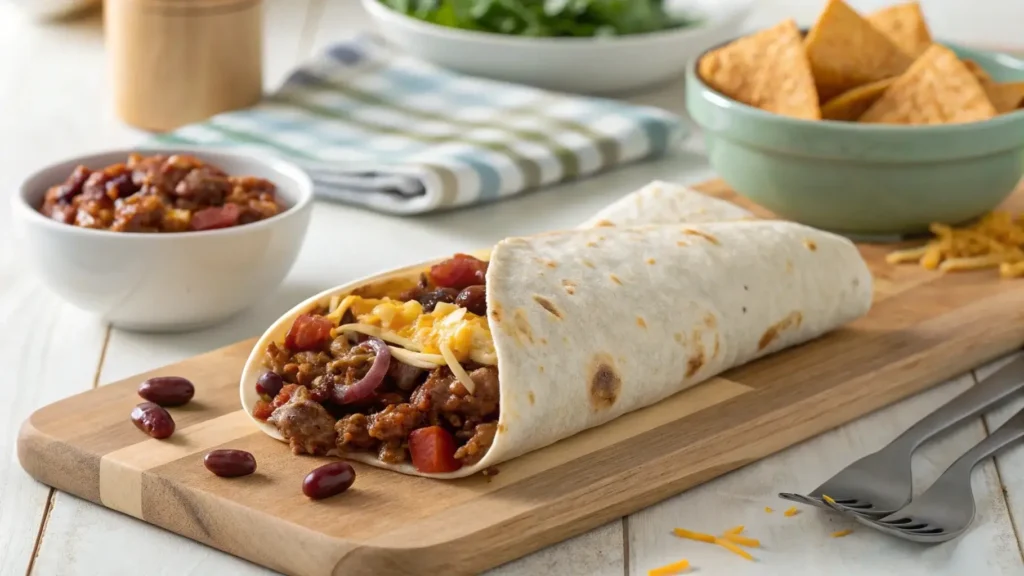
1. Are chimichangas different from burritos?
Yes! While they share similar ingredients, the key difference is that chimichangas are fried or baked to create a crispy shell, whereas burritos are simply wrapped and served as-is. Chimichangas also often feature a richer, more indulgent filling with cheese and seasonings.
2. Can I make beef chimichangas ahead of time?
Absolutely! You can assemble the chimichangas in advance and store them in the refrigerator for up to 24 hours before cooking. If you’re planning to store them longer, freeze them instead. When ready to cook, bake them directly from frozen or thaw them overnight in the fridge.
3. What is the best beef cut for chimichangas?
Ground beef is quick and convenient, but for maximum flavor and tenderness, shredded beef from chuck roast or brisket is ideal. Slow-cooked beef absorbs more of the seasonings and creates a richer, more succulent filling.
4. How do I reheat leftover chimichangas without them getting soggy?
To maintain the crisp texture, reheat them in an oven or air fryer. Preheat the oven to 375°F (190°C) and warm the chimichangas for 10-12 minutes. For an air fryer, set it to 350°F (175°C) and reheat for 5-7 minutes. Avoid microwaving, as it can make the tortilla soggy.
With these tips, you’ll be able to enjoy crispy, flavorful chimichangas anytime! 🌟