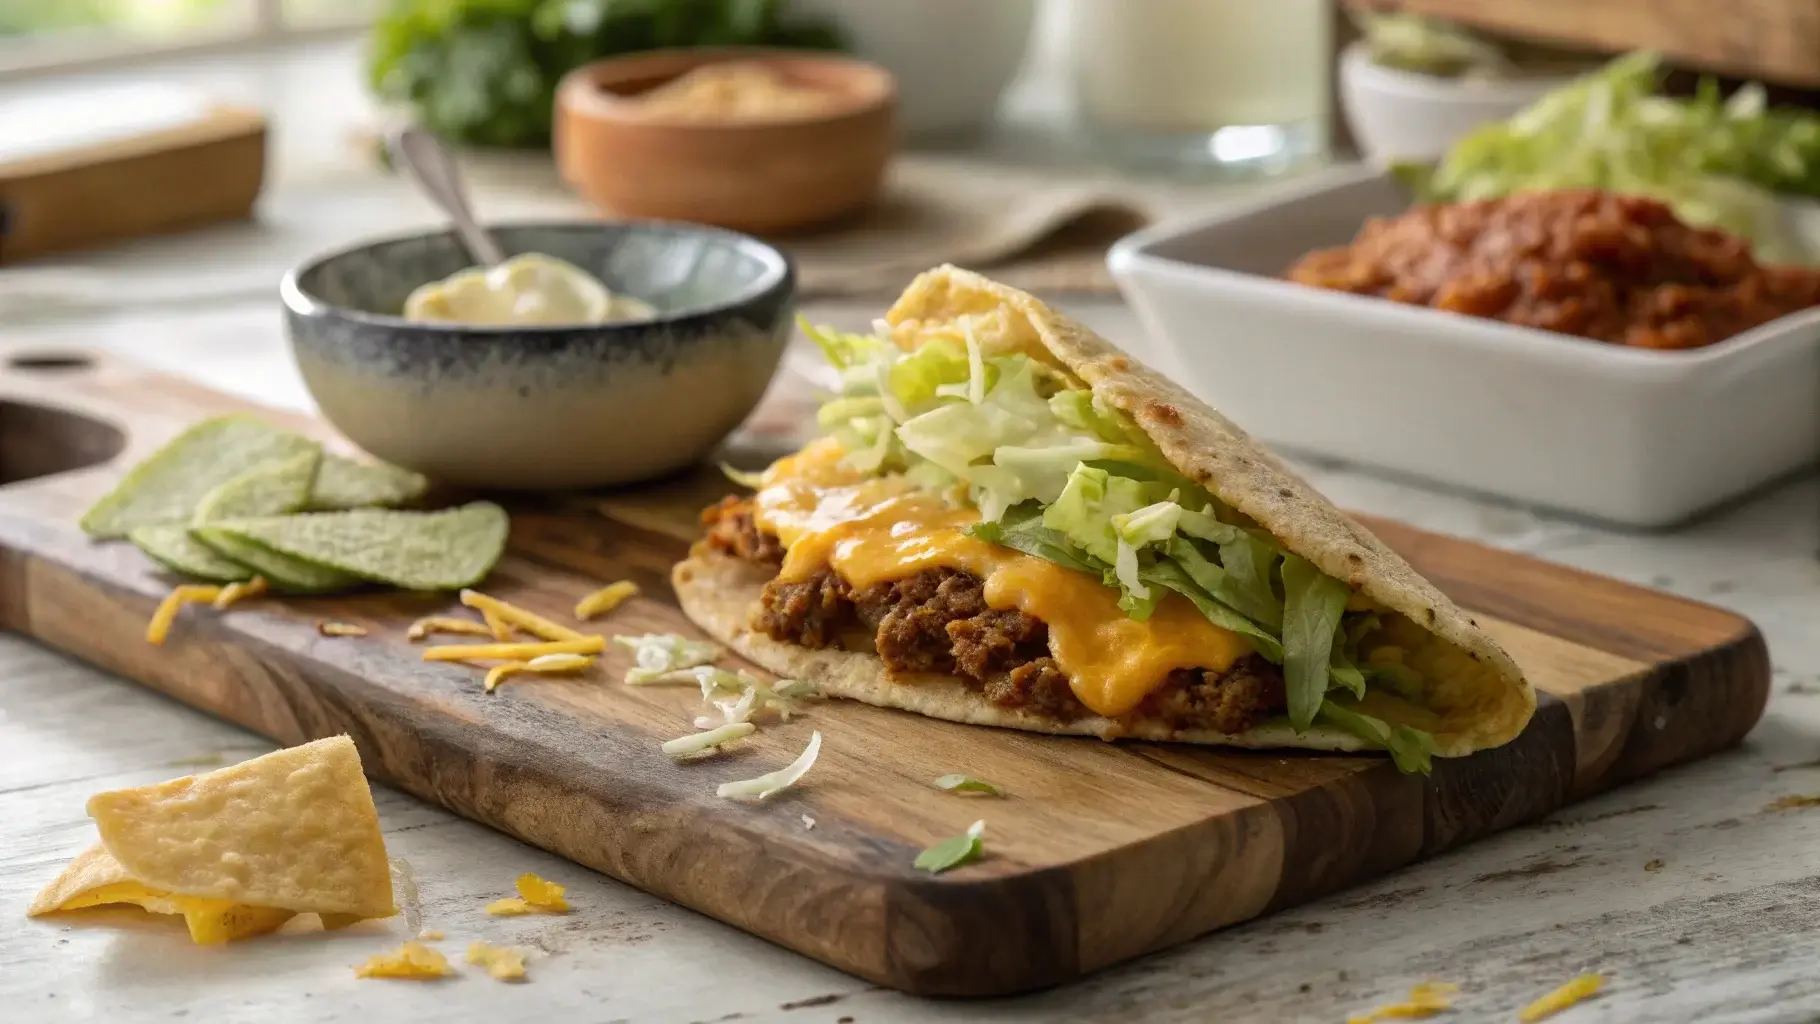
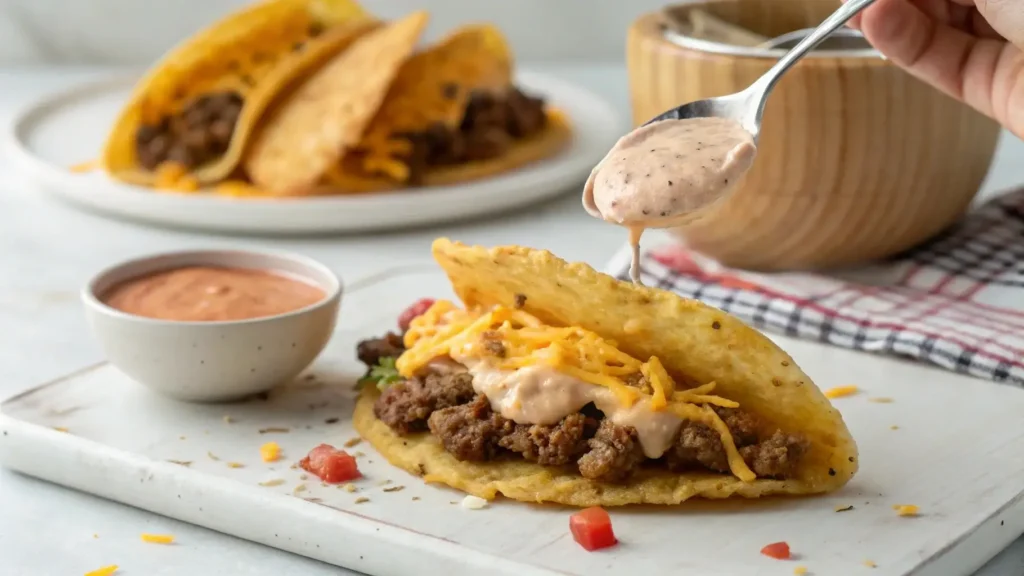
There’s something incredibly satisfying about recreating a fast-food favorite at home—especially when it turns out even better than the original! The Cheesy Gordita Crunch is one of Taco Bell’s most beloved menu items, and for good reason. It combines a crunchy taco shell filled with savory, seasoned beef, wrapped in a warm, cheesy flatbread, and topped with fresh lettuce and a tangy, creamy sauce. The mix of textures and flavors makes every bite irresistible.
I still remember the first time my husband, Momo, and I tried making this at home. We were craving something indulgent but wanted a homemade twist on our favorite drive-thru treat. We had fun experimenting in the kitchen, laughing as we tried to get the cheese to melt just right between the soft and crunchy shells. The moment we took our first bite, we looked at each other in amazement—it was better than what we’d had at the restaurant! Since then, it’s become a staple in our kitchen, perfect for taco nights or when we just need a comfort meal.
In this article, I’ll take you through every step to create the best Cheesy Gordita Crunch Recipe from scratch. We’ll cover everything from ingredients and cooking instructions to customization ideas and serving suggestions. Plus, I’ll share a few tricks to get that signature cheesy layer just right! Let’s get started.
Table of Contents
Why You Should Try This Cheesy Gordita Crunch Recipe Today
At this point, you’re probably craving a bite of this delicious taco creation. But if you’re still wondering whether to try this Cheesy Gordita Crunch Recipe, here are a few reasons why you should make it today!
It’s Better Than Fast Food
Sure, the Taco Bell version is great, but making it at home allows you to:
✔ Use fresher ingredients – No artificial flavors or preservatives.
✔ Control the seasoning – Adjust spice levels to your liking.
✔ Make a bigger portion – Enjoy a satisfying meal without worrying about small servings.
It’s Easy and Fun to Make
This recipe doesn’t require fancy equipment or professional skills. Whether you’re cooking for yourself, your family, or hosting a taco night, the process is simple and enjoyable. Plus, customizing the flavors makes it even more exciting!
It’s a Crowd-Pleaser
No matter who you’re cooking for, this dish is guaranteed to be a hit. The combination of crispy, cheesy, and creamy elements makes it a favorite among both kids and adults.
So why wait? Gather your ingredients, fire up the stove, and treat yourself to a homemade Cheesy Gordita Crunch Recipe that’s bursting with flavor. You won’t regret it! 😊
There are no highly relevant internal linking opportunities for the Cheesy Gordita Crunch Recipe from Kitchenistarecipes. I will proceed without adding any internal links.
Nutritional Information
While homemade versions allow for healthier modifications, here’s an approximate breakdown per serving:
| Nutrient | Amount Per Serving |
|---|---|
| Calories | ~450 kcal |
| Protein | 22g |
| Carbohydrates | 42g |
| Fat | 22g |
| Fiber | 4g |
| Sodium | 780mg |
Note: Nutritional values may vary depending on ingredients used.
Ingredients for the Perfect Cheesy Gordita Crunch
Before we start cooking, let’s gather all the ingredients needed to make this Cheesy Gordita Crunch Recipe at home. Using fresh, high-quality ingredients ensures a delicious and satisfying meal. Below, you’ll find everything you need for the crispy taco shell, cheesy flatbread layer, flavorful beef filling, and signature spicy ranch sauce.
Essential Ingredients for the Shells and Cheese Layer
The double-layered shell is what makes this dish unique. To recreate it at home, you’ll need:
- 6 small flour tortillas (for the soft outer shell)
- 6 crunchy taco shells (for the inner crispy layer)
- 1 cup shredded cheddar cheese (or a mix of cheddar and Monterey Jack)
Savory Beef Filling: A Seasoned Delight
For the taco filling, we’ll use:
- 1 pound ground beef
- 1 tablespoon olive oil
- 2 teaspoons taco seasoning (or a homemade mix of chili powder, cumin, paprika, garlic powder, and salt)
- ¼ cup water (to mix with the seasoning)
Spicy Ranch Sauce: The Secret to the Signature Flavor
This creamy sauce adds a zesty kick to the Cheesy Gordita Crunch Recipe. Here’s what you’ll need:
- ½ cup mayonnaise
- ¼ cup sour cream
- 1 tablespoon vinegar
- ½ teaspoon garlic powder
- ½ teaspoon onion powder
- ½ teaspoon smoked paprika
- 1 teaspoon hot sauce (adjust based on spice preference)
Fresh Toppings for Added Crunch and Taste
To complete the dish, gather these toppings:
- 1 cup shredded lettuce
- ½ cup shredded cheese (extra for topping)
Ingredients Table
| Category | Ingredients | Quantity |
|---|---|---|
| Shells & Cheese | Flour tortillas | 6 small |
| Crunchy taco shells | 6 | |
| Shredded cheddar cheese | 1 cup | |
| Beef Filling | Ground beef | 1 lb |
| Olive oil | 1 tbsp | |
| Taco seasoning | 2 tsp | |
| Water | ¼ cup | |
| Spicy Ranch Sauce | Mayonnaise | ½ cup |
| Sour cream | ¼ cup | |
| Vinegar | 1 tbsp | |
| Garlic powder | ½ tsp | |
| Onion powder | ½ tsp | |
| Smoked paprika | ½ tsp | |
| Hot sauce | 1 tsp | |
| Toppings | Shredded lettuce | 1 cup |
| Extra shredded cheese | ½ cup |
Step-by-Step Cooking Instructions
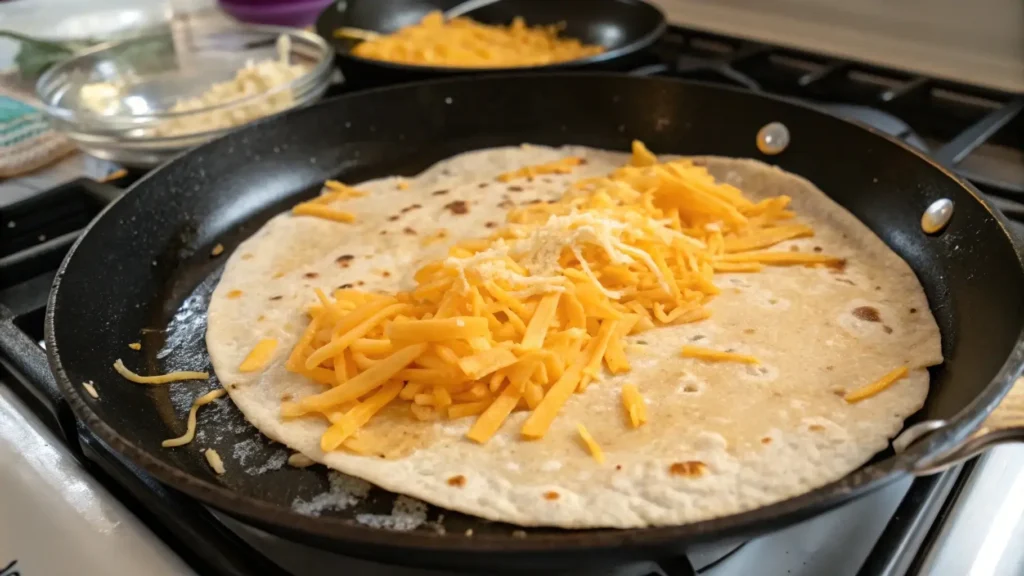
Preparing the Soft Flatbread and Crunchy Taco Shells
- Preheat your oven to 350°F (175°C).
- Warm the flour tortillas on a skillet for about 10–15 seconds on each side until soft and pliable.
- Place shredded cheese on each tortilla, then place them on a baking sheet.
- Bake for 3–5 minutes, or until the cheese is fully melted.
- Immediately press a crunchy taco shell into the melted cheese while it’s still warm, allowing it to stick.
- Set aside while preparing the beef filling.
Cooking and Seasoning the Beef Filling
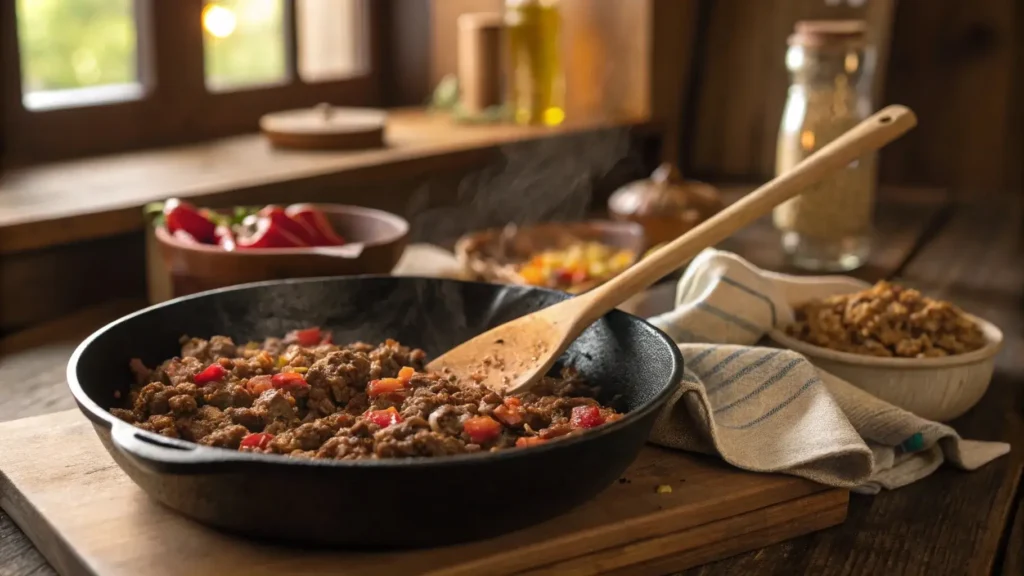
- Heat 1 tablespoon of olive oil in a skillet over medium heat.
- Add ground beef and cook for 6–8 minutes, breaking it apart with a spatula.
- Once browned, drain excess grease.
- Stir in taco seasoning and water, mixing well.
- Simmer for 2–3 minutes until the sauce thickens and coats the beef.
Making the Signature Spicy Ranch Sauce
- In a small bowl, whisk together mayonnaise, sour cream, vinegar, garlic powder, onion powder, smoked paprika, and hot sauce.
- Mix until smooth and creamy.
- Taste and adjust seasoning if needed.
Assembling the Cheesy Gordita Crunch Like a Pro
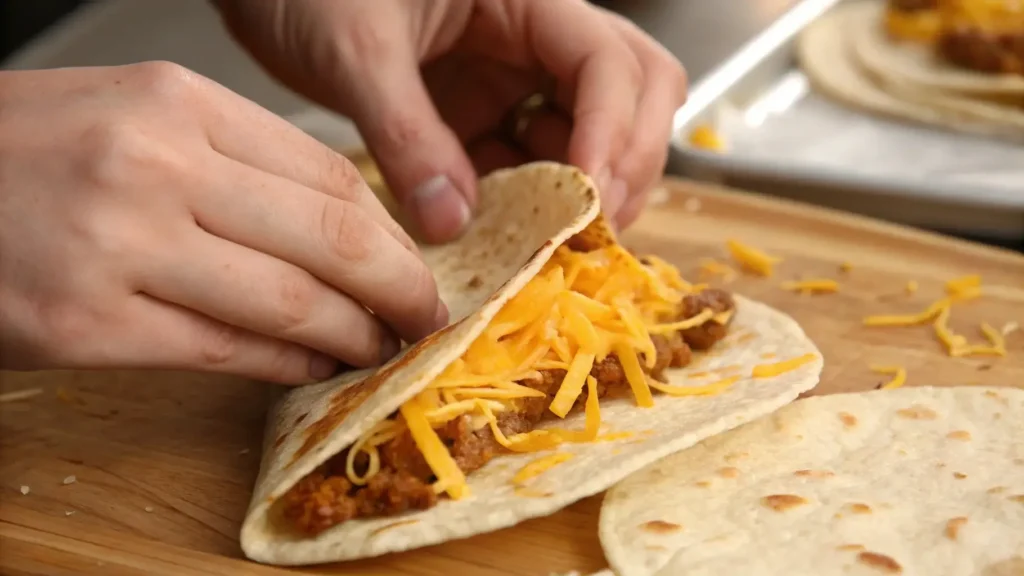
- Take the prepared soft tortilla with the crunchy shell inside.
- Fill the crispy shell with seasoned beef, ensuring an even distribution.
- Drizzle the spicy ranch sauce generously over the beef.
- Add shredded lettuce and a sprinkle of extra cheese on top.
- Serve immediately and enjoy the perfect combination of flavors and textures!
Serving and Pairing Suggestions
Once you’ve assembled your Cheesy Gordita Crunch Recipe, it’s time to think about the perfect way to serve and enjoy it. While this dish is incredibly flavorful on its own, pairing it with the right sides and dips can take your meal to the next level.

What to Serve with Your Cheesy Gordita Crunch
A great taco meal deserves delicious sides! Here are some fantastic options to round out your plate:
- Mexican-style rice – A flavorful blend of rice, tomatoes, and spices adds a hearty touch.
- Refried beans – A creamy, protein-packed addition that complements the crunch of the taco.
- Grilled corn on the cob – A smoky, buttery side that balances out the spices.
- Loaded nachos – Crispy tortilla chips topped with cheese, salsa, and guacamole make for a fun side dish.
- Fresh pico de gallo – A bright and tangy tomato-based topping that adds a refreshing contrast.
Best Dipping Sauces to Elevate the Flavor
If you love extra sauces, try pairing your Cheesy Gordita Crunch with:
- Homemade guacamole – Creamy, rich, and packed with flavor.
- Salsa verde – A zesty tomatillo-based salsa that adds a bright kick.
- Chipotle mayo – A smoky, slightly spicy sauce that enhances the bold flavors.
- Queso dip – A warm, melted cheese sauce for an extra indulgent touch.
Drink Pairings for a Perfect Meal
A refreshing drink can make this meal even better. Here are some ideas:
- Hibiscus tea – Sweet and slightly tart, it pairs beautifully with the spices.
- Lime agua fresca – A light, citrusy drink that enhances the fresh flavors.
- Mango smoothie – A tropical, creamy beverage that balances out the savory notes.
Variations of the Cheesy Gordita Crunch Recipe
While the traditional Cheesy Gordita Crunch Recipe is delicious as is, you can get creative with different variations to suit your taste or dietary preferences. Here are some exciting ways to switch things up.
Chicken Cheesy Gordita Crunch
Swap the beef for grilled or shredded chicken to give your tacos a lighter, protein-packed twist. You can even try Blackstone chicken recipes for a smoky, grilled flavor that enhances the overall taste.
Spicy Cheesy Gordita Crunch
If you love heat, take your tacos to the next level by:
🔥 Adding sliced jalapeños inside the taco.
🔥 Mixing hot sauce into the beef seasoning for extra kick.
🔥 Using pepper jack cheese instead of regular cheddar.
Vegetarian Cheesy Gordita Crunch
For a plant-based option, replace the meat with:
🥑 Seasoned black beans or lentils for a hearty bite.
🥦 Grilled mushrooms or zucchini for a smoky, meaty texture.
🧀 Extra cheese and refried beans to keep it rich and flavorful.
Breakfast Gordita Crunch
Why not turn this into a breakfast treat? Fill the taco with scrambled eggs, turkey sausage, and a drizzle of chipotle mayo for a morning twist on this classic dish.
How to Store and Reheat Cheesy Gordita Crunch
If you have leftovers, don’t worry—this dish stores and reheats well with the right techniques.
How to Store Leftovers
For the best results, store the components separately:
- Taco shells: Keep in an airtight container at room temperature to maintain crispiness.
- Cooked beef or chicken: Store in the refrigerator in a sealed container for up to 3 days.
- Spicy ranch sauce and toppings: Store in the fridge for up to 4 days.
Best Way to Reheat
To keep the tacos tasting fresh, follow these reheating methods:
1️⃣ Oven Method (Best for Crunch) – Preheat to 350°F (175°C) and bake for 5–7 minutes until warmed through.
2️⃣ Skillet Method – Heat in a dry skillet over medium heat for 2–3 minutes per side.
3️⃣ Microwave Method (Quickest Option) – Heat for 30–40 seconds, but be aware that the crunchy shell may soften.
Can You Freeze It?
While the taco shell may lose some crispiness, the beef filling freezes well. Store in a freezer-safe container for up to 3 months. When ready to use, defrost overnight in the fridge and reheat as needed.
Expert Tips for Perfecting Your Cheesy Gordita Crunch Recipe
Making the Cheesy Gordita Crunch Recipe at home is easy, but a few expert tips can help take your dish from good to amazing. Whether you’re a beginner or an experienced cook, these techniques will ensure your tacos turn out just right.
Tips for Beginners
If this is your first time making the Cheesy Gordita Crunch Recipe, don’t worry! Follow these beginner-friendly tips to make the process smooth and enjoyable:
✅ Use store-bought taco seasoning – If you’re not comfortable making your own spice mix, a pre-made seasoning works just as well.
✅ Melt the cheese properly – Make sure the shredded cheese is fully melted before pressing the crunchy taco shell onto the soft tortilla. This helps the two layers stick together.
✅ Keep the heat low when cooking beef – Cooking ground beef on medium-low heat allows the flavors to develop without burning.
✅ Prep everything before assembling – Having all your ingredients ready will make the process quicker and more enjoyable.
Advanced Tips for a Next-Level Cheesy Gordita Crunch
For those who want to take their Cheesy Gordita Crunch Recipe to the next level, here are some pro tips:
🔥 Make homemade tortillas – Freshly made soft tortillas have a better texture and taste than store-bought ones.
🔥 Use multiple cheese types – A blend of cheddar, Monterey Jack, and a little pepper jack will give a richer, more complex flavor.
🔥 Grill the assembled taco briefly – A quick press on a hot skillet for 30 seconds will make the outer layer crispier while keeping the inside warm.
🔥 Let the beef rest before assembling – Allowing the seasoned beef to sit for a few minutes lets the flavors meld together.
🔥 Add a smoky touch – A sprinkle of smoked paprika or a dash of liquid smoke can enhance the overall flavor.
By following these tips, you’ll master the Cheesy Gordita Crunch Recipe like a pro, making each bite even more irresistible!
Frequently Asked Questions (FAQs)
What makes the Cheesy Gordita Crunch different from a regular taco?
The biggest difference is the double-layered shell. Unlike a traditional taco, this dish wraps a crunchy taco shell inside a soft, cheesy flatbread. The extra layer adds a rich, melty texture that perfectly balances the crispiness of the taco shell.
Can I make a vegetarian version of the Cheesy Gordita Crunch?
Absolutely! You can swap the beef for:
- Seasoned black beans for a protein-rich option.
- Grilled mushrooms or zucchini for a smoky, earthy twist.
- Lentils or plant-based crumbles for a meaty texture without the meat.
How do I keep the taco shell crispy while assembling?
To prevent the crunchy taco shell from getting soggy:
- Assemble the tacos right before serving to keep the texture fresh.
- Use a warm tortilla and melted cheese to attach the two layers so that moisture doesn’t seep in.
- Drain excess grease from the beef before adding it to the taco shell.
What is the best way to store and reheat leftovers?
If you have leftovers, follow these steps for the best results:
- Storage: Keep the taco filling, tortillas, and toppings separate in airtight containers in the fridge.
- Reheating: Warm the beef in a skillet, heat the tortillas in the oven for a few minutes, and then assemble fresh before eating.
Now you’re ready to make and enjoy the Cheesy Gordita Crunch Recipe like a pro! Whether you follow the original recipe or put your own twist on it, this dish is guaranteed to be a hit at your next meal. 😊
Final Thoughts on the Cheesy Gordita Crunch Recipe
Making the Cheesy Gordita Crunch Recipe at home is more than just a fun cooking experience—it’s a way to bring a restaurant-quality dish right to your kitchen. With fresh ingredients, simple steps, and a few expert tricks, you can create a meal that’s even better than the fast-food version.
Why This Recipe is Worth Trying
One of the best things about this recipe is its versatility. Whether you prefer the classic beef filling, want to experiment with Blackstone chicken recipes, or go for a vegetarian option, the Cheesy Gordita Crunch Recipe adapts to your taste. Plus, the combination of crispy, soft, cheesy, and creamy textures makes it a dish that everyone will love.
Another reason to give this recipe a try? It’s budget-friendly and customizable. Instead of spending money on takeout, you can make a larger batch at home with high-quality ingredients. Plus, you control the flavors, spice levels, and portion sizes—something you can’t do when ordering from a restaurant.
A Recipe to Make Again and Again
Once you’ve made this dish, don’t be surprised if it becomes a regular part of your meal rotation. Whether for a quick weeknight dinner, a family taco night, or a fun gathering with friends, this recipe is always a crowd-pleaser.
So, what are you waiting for? Grab your ingredients, fire up the stove, and enjoy a homemade Cheesy Gordita Crunch Recipe that’s bursting with flavor. You won’t regret it! 😊